How to Batch Resize Images Without Installing Software
Summary
Resizing a folder of images to consistent dimensions fixes broken grids, speeds uploads, and keeps your CMS tidy, all in your browser, no software needed.
Inconsistently sized images are a hidden tax on every project. A product gallery where one image is 3000×2000px and the next is 800×600px looks unprofessional and forces the browser to compensate for the size mismatch with layout recalculations. A blog post where images are various widths from 400px to 4000px loads unpredictably and at different speeds. A CMS upload folder with no sizing discipline becomes harder to manage with every new upload.
Resizing to consistent dimensions before upload is one of those unglamorous tasks that pays off continuously. Do it once per image, and every subsequent rendering of that image, in search results, in email newsletters, in social media shares, benefits.
This guide covers the three ways to resize (by exact pixels, by percentage, and by social media preset), the correct target dimensions for every common use case, and the difference between resizing and compressing, because you need both for optimal results.
Three Ways to Resize an Image
Different situations call for different resize methods:
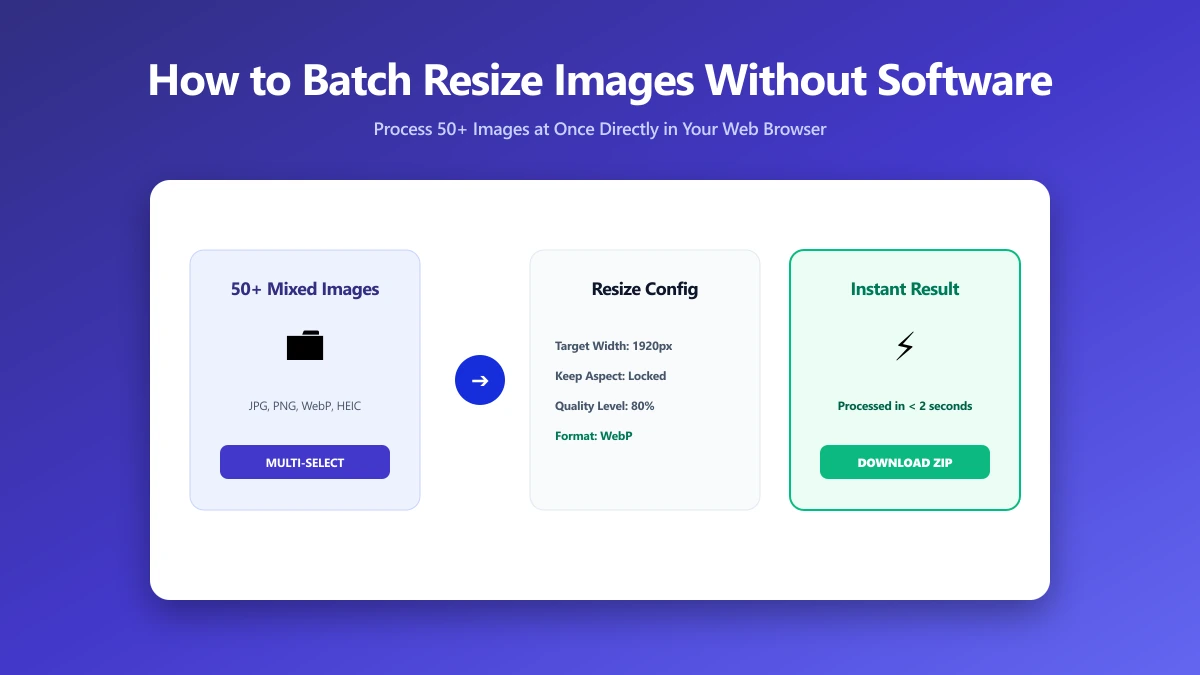
- ●Exact pixels: Set a specific width and/or height. Lock the aspect ratio (recommended) to prevent distortion, the tool calculates the other dimension automatically. Or stretch to fill exact dimensions when the destination container requires a specific aspect ratio.
- ●Percentage: Scale down proportionally by a fraction of the original. "50%" halves both dimensions and reduces pixel count by 75% (and file size by a similar margin). Useful when you want to reduce a batch of mixed-size images by the same proportion.
- ●Social media preset: Choose a platform and post type; the tool fills in the correct pixel dimensions automatically. The preset list includes Instagram, YouTube, Twitter/X, Facebook, LinkedIn, and Open Graph image sizes.
How to Resize an Image Online
- 1.Open imagepdf.tools/resize-image
- 2.Drop your image onto the page or click to browse. JPEG, PNG, and WebP are supported.
- 3.Choose By Size, By Percentage, or Social Media tab depending on your goal.
- 4.Enter the target dimensions or pick a preset. Enable Lock aspect ratio unless you specifically need non-proportional scaling.
- 5.Click Resize & Save. The resized image saves instantly. No upload occurs, all processing runs in your browser.
Enable "Do not enlarge" to prevent upscaling. Resizing a small image to a larger size adds no detail, it just interpolates new pixels that make files bigger with no quality benefit. This option is especially important when batch-processing mixed-size images where some may already be smaller than the target.
Target Dimensions for Every Common Use Case
| Destination | Width | Height | Notes |
|---|---|---|---|
| Blog post hero image | 1600px | varies | Most CMS templates render at 1200–1400px; 1600px covers 2× retina |
| Blog post inline image | 1200px | varies | Inline images rarely exceed 800px display width; 1200px = 1.5× retina |
| Product photo (e-commerce) | 2048px | 2048px | Square crop; Shopify and WooCommerce generate thumbnails from this |
| Email header image | 600px | 200–300px | Most email clients render in a 600px column; wider images are clipped |
| Open Graph / social preview | 1200px | 630px | 1.91:1 ratio; required by Facebook, Twitter/X, LinkedIn, WhatsApp |
| YouTube thumbnail | 1280px | 720px | 16:9 ratio; must be at least 640×360px |
| Desktop wallpaper | 1920px | 1080px | Full HD baseline; 2560×1440 for QHD monitors |
| Thumbnail / card image | 400–500px | varies | Match your CSS rendered size × 2 for retina |
Resize vs. Compress: What Is the Difference?
Resizing changes the number of pixels in the image. A 4000×3000 image resized to 1200×900 goes from 12 million pixels to 1.08 million, a 91% reduction in pixel count, which translates to a proportional reduction in memory usage and a substantial reduction in file size.
Compressing reduces the file size by encoding the existing pixels more efficiently, removing data within the same pixel dimensions. JPEG and WebP compression can reduce a properly-sized image by a further 30–70% with no perceptible quality loss at screen resolution.
For the smallest possible output, do both in sequence: resize first (biggest impact), then compress. A 4000px image resized to 1200px and compressed to quality 80 will be 90–95% smaller than the original, with no visible quality loss at its displayed size. Compress the resized result here.
When Does Resizing Hurt Quality?
Resizing down (making an image smaller) generally preserves quality well, the algorithm averages neighboring pixels, which is mathematically sound. Resizing up (enlarging) interpolates new pixels that did not exist in the source, which introduces softness or artifacts. The rule is simple: never resize above the original dimensions. Use the "Do not enlarge" option when batch-processing images of unknown sizes.
One specific scenario to avoid: resizing a JPEG down, re-saving it, then resizing again later. Each JPEG encode introduces generational loss. If you know you'll resize multiple times, start from a high-quality original (JPEG 90+ or PNG) and only apply final-quality compression (quality 80) at the last export step.
The Bottom Line
Resize before you upload. The table above gives the right target dimensions for every common destination. After resizing, compress the result to cut the file size by another 40–70%. Both tools run entirely in your browser, no upload, no account, no waiting.
Frequently asked questions
Does resizing an image reduce its quality?
What is the difference between resizing and cropping?
What happens if I resize an image to be larger than the original?
Should I resize images before or after compressing them?
How do I resize images in bulk to the same dimensions?
Sources & references
This article was researched and written by Nikola, drawing on the following primary sources and documentation:
Ready to try it?
All tools run entirely in your browser, no uploads, no account required.
Resize Image