Image Compression for People Who Just Want Smaller Photos
Summary
No technical jargon. Make your photos smaller so they send faster, upload without errors, and stop clogging your device. Free browser tool, nothing to install.
You try to email three photos to your mum and Gmail says the attachment is too large. You try to upload a photo to a council form and it rejects anything over 2 MB. You want to send holiday pictures on WhatsApp but the automatic compression makes everyone look blurry. All of these problems have the same solution: compress the photos yourself, on your terms, before sending.
Image compression sounds technical but the process itself takes about 30 seconds. This guide skips the jargon and tells you exactly what to do, why it works, and when not to do it.
Why Are Phone Photos So Large?
Modern smartphone cameras capture incredible detail. A recent iPhone in standard mode saves photos at around 12 megapixels, producing files of 3–8 MB per photo. In ProRAW or HEIC high-efficiency modes, the same photo might be 15–25 MB. That's useful for printing and editing, but it's more than you need for emailing, uploading to a form, or sharing in a chat.
The file size comes from storing millions of pixels plus colour information for each one. Compression removes the least-important colour details, the tiny variations your eye glosses over in a uniform patch of skin or a clear sky. Done at the right level, the compressed photo looks identical to the original on any screen you're likely to view it on.
What Compression Actually Does to Your Photo
Think of it this way: your camera saves a photo the way a perfectionist packs, everything neatly, nothing omitted. Compression is like packing for a weekend trip instead of a month: you take everything you actually need, leave behind things you won't notice are missing, and the bag is much lighter.
The technical process involves the encoder analysing each small region of the photo and approximating areas of gradual colour change. Edges and fine detail are preserved more carefully than smooth areas. At quality 80, roughly 70–80% of the original data is kept, but it's the 70–80% that matters most to human vision.
The Quality Setting: The Only Number You Need to Know
Every image compressor has a quality slider. Here's what the numbers mean in plain terms:
| Quality | What it looks like | File size reduction | When to use it |
|---|---|---|---|
| 90–100 | Identical to original | 10–30% | Archiving, printing, editing, not for sharing |
| 80–85 | Looks identical at normal viewing | 50–70% | Emailing, form uploads, portfolio sharing, the sweet spot |
| 70–75 | Nearly identical, visible only zoomed in | 65–75% | Social media posts, thumbnails, chats |
| 60 | Slightly softer in detailed areas | 75–80% | Situations with tight size limits (e.g. passport photo portals) |
| Below 50 | Visible blotchy patches, soft edges | 80–90% | Avoid, the quality loss is noticeable |
Quality 80 is the sweet spot for nearly everything. It cuts file size by 60–70% compared to your camera's original while looking identical on any phone or laptop screen at normal viewing size.
How to Compress a Photo in 30 Seconds
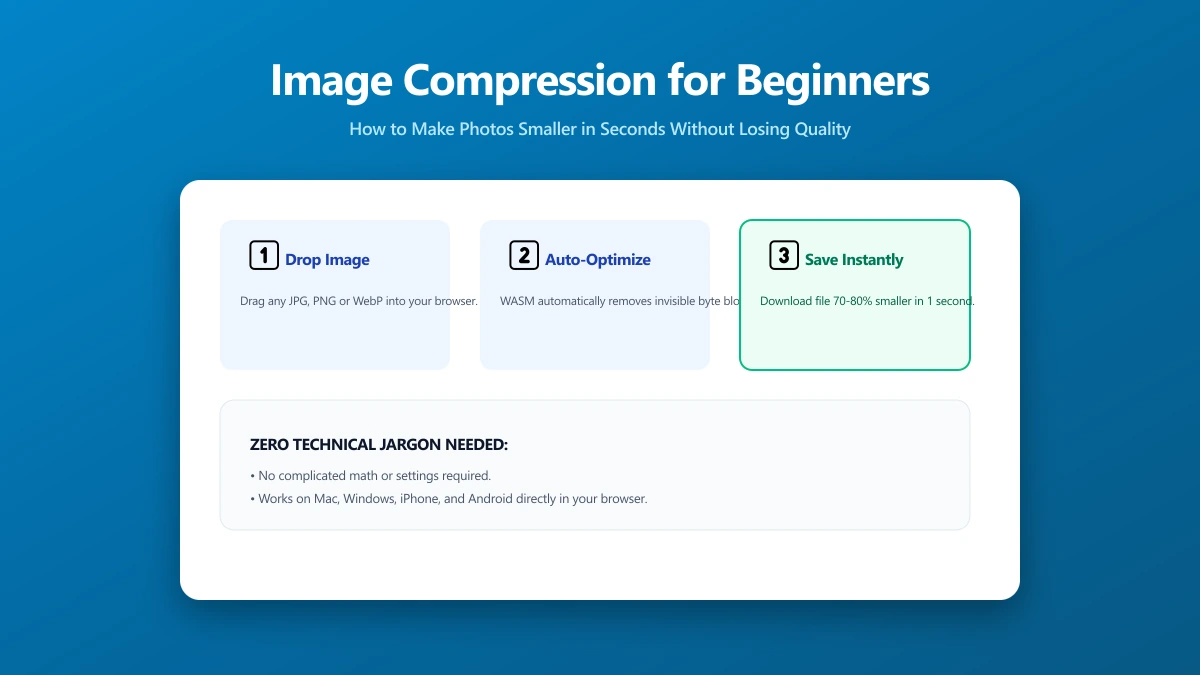
- 1.Open imagepdf.tools/compress-image in your browser
- 2.Drag your photo onto the page, or click to choose it from your files
- 3.Leave the quality slider at 80 (it starts there by default)
- 4.Check the estimated size shown below the slider
- 5.Click "Save", the compressed file saves to your Downloads folder
Nothing is uploaded anywhere. The compression happens entirely on your device, no internet connection needed after the page loads, no account required, no files sent to any server. This is important if you're compressing photos that contain personal information.
How Much Smaller Will It Get?
Results vary significantly by photo content. Photos with lots of fine detail (trees, fabric, hair, crowds) compress less than photos with smooth areas (clear sky, solid backgrounds, portraits with simple backgrounds). Here are realistic estimates at quality 80:
| Photo type | Original size | After compression | Savings |
|---|---|---|---|
| iPhone portrait (smooth background) | 4 MB | 500–800 KB | 75–87% |
| Landscape with lots of detail | 6 MB | 1–2 MB | 65–83% |
| Screenshot (UI or document) | 2 MB | 300–600 KB | 70–85% |
| Camera RAW export (12MP) | 10 MB | 1.5–3 MB | 70–85% |
| Dense forest / crowd photo | 8 MB | 2–4 MB | 50–75% |
Common Situations Where Compression Helps
- ●Email attachments: Gmail caps attachments at 25 MB; Outlook at 20 MB. A batch of ten 5 MB photos hits the limit immediately. At quality 80, the same ten photos are typically 5–8 MB total.
- ●Government and council forms: Many official portals accept images under 1–2 MB. A standard phone photo is usually rejected without compression.
- ●Job applications and CVs: Photo uploads for job applications often have strict file size limits. Quality 80 at original resolution is usually well under 500 KB.
- ●WhatsApp and Telegram: These apps compress images automatically on upload, often more aggressively than quality 80. Compressing yourself first means you control the quality, not the app.
- ●Storage management: Compressing older photos before backing them up can cut storage requirements by 60–70% while keeping the photos visually identical.
When Not to Compress
- ●Original backup copies: Always keep your originals. Compression is irreversible, once the detail is removed, it cannot be recovered. Archive originals before compressing for sharing.
- ●Photos going to a print lab: Print services need the full resolution and quality. Send the original or a quality 90+ export, never your compressed web version.
- ●Photos you're going to edit: Edit first, compress last. Running a compressed photo through editing software, then compressing again, adds a second generation of quality loss.
- ●RAW files: RAW files are not standard image files, they're camera data that needs processing first. Export to JPEG or PNG, then compress that export.
What About HEIC Photos from iPhone?
iPhones shot in HEIC format (the default for newer models) produce files that look large but are already fairly efficient. However, HEIC isn't universally supported, many websites, email clients, and Windows programs can't open them. Converting to JPEG before sharing is good practice, and compressing to quality 80 during conversion keeps the file small.
If you're seeing .heic files in your camera roll and having compatibility problems, you can convert to JPEG in the same step as compression. On iPhone: Settings → Camera → Formats → Most Compatible saves future photos as JPEG automatically.
Frequently Misunderstood: Compression vs. Resizing
Compression and resizing are different operations. Compression reduces file size by removing detail within the same pixel dimensions. Resizing reduces file size by reducing the number of pixels. Both reduce file size, but resizing also makes the image physically smaller.
For form uploads and email sharing, compression alone is usually sufficient. If a portal specifically requires images under a certain pixel dimension (e.g. passport photos at 600×600px), you need to resize as well.
Bottom Line
Compressing a photo takes 30 seconds and typically makes it 5–10× smaller with no visible difference at normal viewing sizes. Quality 80 is the right setting for almost every everyday use case. Your original photo is never touched, the compressor creates a new, smaller version that you save and share, while the original stays on your device unchanged. Try it now, drag a photo in and see the estimated size before you commit.
Frequently asked questions
Is it safe to compress photos online?
Does compression affect photo quality?
What is the best quality setting for emailing photos?
Will compression affect photos I print later?
How is compression different from just resizing a photo?
Sources & references
This article was researched and written by Nikola, drawing on the following primary sources and documentation:
Ready to try it?
All tools run entirely in your browser, no uploads, no account required.
Compress Image