
Why Are My Images Blurry When Uploaded to WordPress? (And How to Fix It)
Summary
Find out why WordPress makes sharp images look soft: the size your theme serves, the 2560px big image threshold, and JPEG recompression. Fixes for each cause.
Most blurry WordPress images are not damaged by the upload itself. They look soft because the page is showing a smaller copy than the space it fills, and the browser stretches that copy to fit. WordPress makes several resized versions of every image you upload, and your theme or the image block decides which one visitors see.
The other two causes are the big image threshold, which shrinks anything wider or taller than 2560 pixels, and recompression, which saves every generated copy as a new JPEG at quality 82. You can tell which one you are dealing with in about ten seconds.
The ten second check: read the file name
Open the published post, right-click the blurry image and choose Open image in new tab. Look at the end of the address:
| File name ends in | What it means | Where to fix it |
|---|---|---|
| -300x200.jpg, -768x512.jpg, -1024x683.jpg | A resized copy is being shown, smaller than the space on the page | The block's Resolution setting, or the theme |
| -scaled.jpg | Your original was over 2560 px, so WordPress shrank it and saved it again | Upload at the size you need, or change the threshold |
| Your original name, no suffix | The full file is shown, but it is too small for a high density screen or was over-compressed before upload | Export a bigger, cleaner file |
| A CDN address such as i0.wp.com, or ?resize= in the URL | Jetpack or another image service is resizing on the fly | That service's settings |
Compare the pixel size in the file name with the width the image takes on screen. If the file is 768 pixels wide and the content column is 1100, the browser is enlarging it by about 43 percent, and that always looks soft.
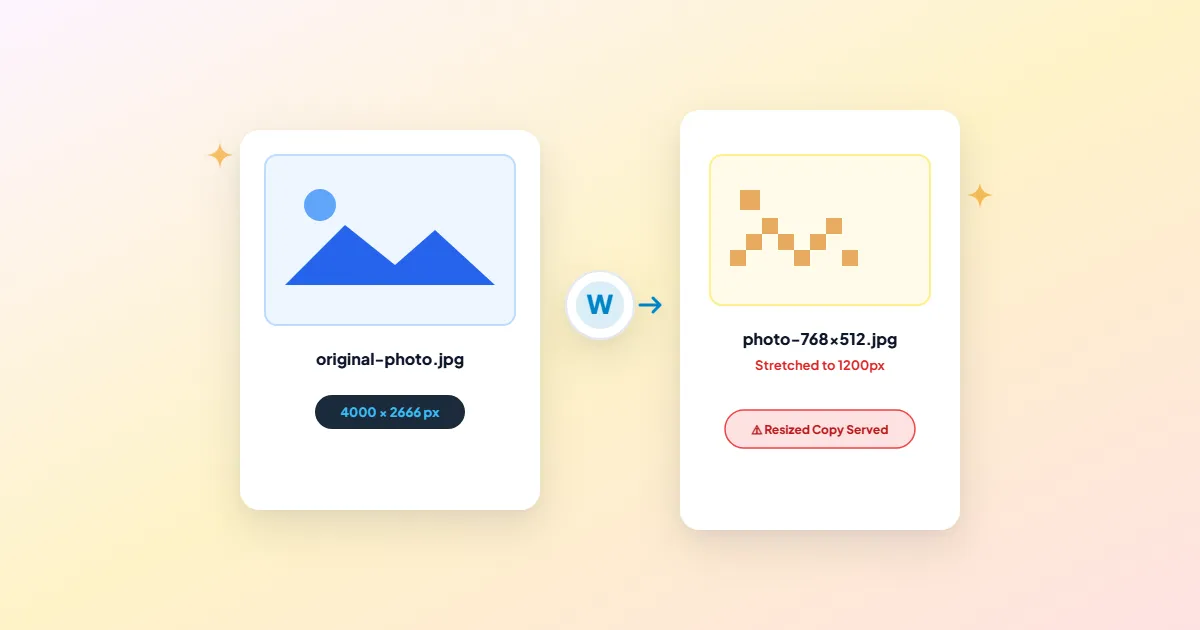
What WordPress does to every upload
When you add an image, WordPress keeps the file and builds a set of copies at the sizes listed under Settings > Media. The defaults are Thumbnail (150 x 150, cropped), Medium (up to 300 px) and Large (up to 1024 px). There is also a hidden 768 px size, and your theme or plugins can add more. Each copy is resized and encoded by the image library on your server, which is Imagick or GD depending on the host.
Since WordPress 5.3 there is one more step. If the width or height of an upload is over 2560 pixels, WordPress creates a scaled copy with -scaled added to the name and treats that copy as the "full size" image from then on. The original stays in your uploads folder, but pages never point to it.
Every JPEG that WordPress generates, including the -scaled one, is saved at quality 82 by default. For a camera photo that is a sensible trade. For a JPEG you already compressed in Photoshop, it is a second round of loss. For screenshots and graphics with small text, it adds fuzzy halos around every letter.
Fix 1: Pick a larger size in the block
If the address showed a size such as -300x200 or -1024x683, the post is asking for that copy. Change it in the editor:
- 1.Open the post in the block editor and click the blurry image.
- 2.In the block settings sidebar, find Resolution. Depending on your theme and the size of the upload, it offers Thumbnail, Medium, Large and Full Size.
- 3.Choose Full Size, or Large if Large is at least as wide as your content column.
- 4.Click Update and check the live page again with the file name test.
The Gallery block has its own Resolution setting that applies to every image inside it, so check that too. Featured images are different: the theme decides which size they use. If a featured image is soft while images in the post body are sharp, the theme is requesting a small size for that slot, and the fix belongs in the theme settings or a child theme.
Fix 2: Upload at twice the display width
Phones and most current laptops pack two or three device pixels into each CSS pixel. An image that fills an 800 pixel content column needs roughly 1600 real pixels across to look crisp on those screens. Uploading an image that is exactly 800 pixels wide guarantees a soft result on a phone, even if it looks fine on an older monitor.
- 1.Find your content width: right-click the image on the live page, choose Inspect, and hover the highlighted img element. The tooltip shows its displayed width.
- 2.Multiply that width by two. For most blogs this lands between 1400 and 2400 pixels.
- 3.Resize your image to that width, keeping the aspect ratio. Resize Image does this in the browser with the ratio locked, and nothing is uploaded.
- 4.Compress it once, at quality 80 to 85 for photos. Compress Image shows the before and after size, and Convert to WebP usually gives a smaller file at the same quality.
- 5.Upload the result. Because it is under 2560 pixels, WordPress keeps your file as the full size image and does not create a -scaled copy.
Uploading the 6000 pixel camera original is not the answer. WordPress will shrink it to 2560 anyway, recompress it, and leave a large file in your uploads folder that no visitor ever sees.
Fix 3: Change the threshold or JPEG quality with code
Photographers who need full resolution files on the page can raise or turn off the threshold. Add one of these to a child theme's functions.php file or a code snippets plugin:
// Turn the big image threshold off completely
add_filter( 'big_image_size_threshold', '__return_false' );

// Or raise it to 4000 pixels instead
add_filter( 'big_image_size_threshold', function () { return 4000; } );

// Save generated JPEG copies at quality 90 instead of 82
add_filter( 'jpeg_quality', function () { return 90; } );
These filters only affect images processed after you add them. Copies that already exist keep their old pixels until you rebuild them, for example with the Regenerate Thumbnails plugin. Quality 100 is rarely worth it: files grow a lot for a difference you will struggle to see, and 88 to 92 is plenty for most sites.
Turning the threshold off means a 7000 pixel photo becomes your full size image. Galleries and posts that use Full Size will then serve very heavy files to every visitor. Resizing before upload is usually the better fix.
When the theme stretches a correct image
WordPress adds srcset and sizes attributes so the browser can pick the best copy for the screen. The default sizes value assumes the image is never shown wider than the size you picked, for example (max-width: 1024px) 100vw, 1024px. If your theme then makes the image wider with CSS, such as a full width layout that sets width to 100 percent, the browser still picks a file that is too narrow and scales it up.
You can confirm this in Inspect: the rendered width is larger than the file's natural width. Set the block to a larger Resolution, use the Wide or Full alignment only where the theme supports it, or ask the theme developer to adjust the sizes value through the wp_calculate_image_sizes filter.
Screenshots, diagrams and text graphics
Anything with sharp edges and lettering suffers most from JPEG compression. Upload screenshots and diagrams as PNG, or as high quality WebP, which WordPress has accepted since version 5.8. WordPress generates resized copies in the same format as the upload, so a PNG stays a PNG and keeps clean edges at every size.
Frequently asked questions
Why does the image look sharp in the editor but soft on the live site?
Can I get my original back after WordPress made a -scaled copy?
Will regenerating thumbnails fix images already placed in posts?
Why are my WooCommerce product photos blurry?
Does an optimization plugin make blurriness worse?
Sources & references
This article was researched and written by Nikola, drawing on the following primary sources and documentation:
Ready to try it?
All tools run entirely in your browser, no uploads, no account required.
Resize ImageMore in Performance & SEO
How to Fix "PDF Exceeds Maximum File Size Limit" on arXiv and Academic Portals
How to Optimize Images for Apple Retina and High-DPI Screens Without Bloating Page Weight
Why Do Animated GIFs Look Grainy? (And How to Convert to Smooth Animated WebP)